Technology improves every year and if used correctly, can have a very positive improvement in your current lifestyle. If you are currently using outdated hardware or software, maybe its time for you to get a technology refresh at home too.
First things first, what exactly is a technology refresh at home, and how is it different from a technology upgrade?
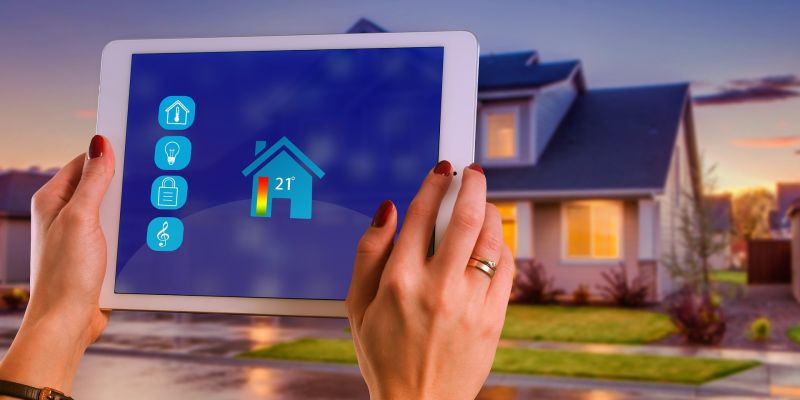
A technology refresh at home is a redesign of how you use technology. It starts off with a simple question on how you want to use technology in your life and understand how it can benefit you in your everyday life.
A technology upgrade is just an upgrade of a technology elements, but keeping the original design intact. If you need a new computer or phone, you just replace it. The fundamental design on how you use it remains the same.
But where to start? A tech refresh at home can be complicated and very expensive. Is it worth the cost and time, and will it accomplish what you want?
I recently went through a technology refresh at home (tech refresh for short) and learned a lot in the process. This article is all about sharing what I learned to make your technology refresh at home go a lot faster and easier.
Lets get started.

10 Steps for a Successful Technology Refresh at Home
1. Why do a Technology Refresh (Tech Refresh)?
Every project always starts with the same process. List all objectives of the project, create a list of goals for each objective, and come up with a detailed plan for achieving those goals and objectives. Doing a technology refresh at home is no different.
In a tech refresh, I always like to recommend the main goal should be to make your life better (or your business and organization better)? Having inverse objectives (better tech that costs less money) is usually a bad idea so make sure your objectives will be achievable.
When I started my technology refresh project, I listed my objectives as follows:
My main objective of technology refresh is to improve the quality of life and convenience in the home. I also wanted better security and more efficient use of energy, saving money in the long run.
I was overly concerned to make sure there is compatibility between technologies. This is key to making everything work.
In addition, I wanted to minimalize my technology and make things simpler to use and manage. Simple designs are always more stable. I also wanted to improve our multimedia experience.
The last technology refresh objective for my family was to build a virtual reality system and understand the future of VR could be in the home.
The first step is to write down what you want your technology to do for you. Included are my objectives with several goals and tasks (listed under step 5, Create a Project Plan). Please feel free to reuse these to get you started on your own project.
Note that there is a lot of overlap in the goals supporting multiple objectives. For example, installing a doorbell camera will improve security, convenience, and minimize old technology. This will be the case with a lot of goals if they are designed to all work together.
Understanding your objectives and goals are a critical first step in creating a project design that makes sense.
Once you have a design, you can easily move into creating your project plan and budget.
2. Evaluate Your Current Software and Services
People don’t use hardware; people use software. Software comes in many forms. It could be traditional PC, web based, or just an app for your phone or tablet. No matter the form, it is designed to help us manage our lives.
All this software are the tools for running our lives. Our banks, insurance, music and media, communication, and countless other things are just software that we interact with everyday.
But this software changes everyday (and not always for the better). There are new apps, PC software, and cloud services springing up everyday demanding our money and promising to deliver things we could only dream about.
The fact is most of the software we use today doesn’t live up to the promises made when we bought it, and soon after installing it we start looking for something better. When we don’t have clear objectives and goals, we are easily distracted by shinny new products and promises.
In this phase, we just look at our current objectives and goals, and see if our existing software can do what our goals demand. If it doesn’t, we look for something new that can, and add it to our design.
Don’t get pulled into always upgrading to the latest and greatest if the current version does exactly what you want. If it doesn’t meet your objectives, research other options.
3. Evaluate Your Current Hardware
Like software, when you evaluate your hardware, you will be able to identify what current hardware will support your objectives, goals and software needs, and which will not. Make a complete list of what you have, what you need, and estimated costs for its replacement.
Compatibility between hardware and software is critical. Having incompatible devices will just make it harder to have everything work together. Create a standard and stick to it.
When you create a list, I find it easier to also draw a picture of how everything would work together. Buying similar hardware will make things easier. If your budget allows, I recommend using Ubiquiti hardware for the core network. This stuff is incredible but not simple to deploy and manage. If you are a techie like me, there is no better solution.


I also decided to standardize my smart home around Samsung SmartThings, and I will not deploy any new technology that is not compatible with this hub. This makes everything work seamlessly with everything else. This means I need to avoid the cheaper WIFI Smart Home Tech on the market.

There are plenty of other technologies you can focus on like Wink, Home Assistant, or even Hubitat. The key is to pick one as a standard and slowly grow your smart devices to meet your objectives.
4. Create a New Technology Design
All along you have been building an idea of what you need, what you have, and deciding where changes are needed. Now is where you create a design of how everything will work together to meet your objectives.
This is the fun part and will take the longest amount of time. As you add each component to your design, you need to do lots of research to learn how everything will work together to deliver your objectives.
For example, if I plan to use Office 365, I will also standardize on OneNote and OneDrive. will I be able to sync OneDrive well on a mac? Probably not well, and will need to alter the design to make sure everything I need connects perfectly together.
If I buy z-Wave switches and WIFI outlet plugs, how will I control the lights through the my Echo and Google home speakers? Will I be able to create automations that control both? If I have a Nest thermostat, can I have it manage the ceiling fans to better circulate air and make the house more comfortable?
If you focus on these type of questions in the design phase, you will not have problems later when you are deploying it all together.
Read reviews of people doing what you want to do and learn how they were able to get it to work (or not work). Start simple, take good notes, and be as detailed as possible. You will thank yourself later.
5. Create a Project Plan
The project plan is simply how you will deploy it without overwhelming yourself in the process.
The first step is always to build your infrastructure layer. This means your core network including routers, access points, and shared services. When you have a solid foundation, your other services will be much more stable and easier to deploy. Over build this layer as you don’t want to change it often.
The project plan is long, detailed, and always changing. It should contain planned dates for deployment and any information you need to get the job done. Linked below is my project plan that is always changing. I actually use MS OneNote for the plan but it didn’t convert well but feel free to use it to get you started.
6. Create a Budget
Good technology is expensive and will be out dated before you know it. I give most products a few years at most.
Just because the technology will be outdated, your goals may not change that often, so you can continue to use outdated tech long after its life cycle (but your overall design should still be reviewed every few years).
I place a great value on my time, data, security, and comfort, and willing to pay for products that can deliver what they promise. While evaluating your current technology, you created a list of hardware, software, and services needed to accomplish your technology refresh at home goals. Now you can divide that list into smaller parts that you can budget and deploy over time.
If the whole project will cost $2,000 and you can budget $1000 a year, then your project can be completed in 2 years. Also take into account if there are cost savings like lower electric bills or lower heating costs, or if you will increase productivity due to the project, and factor that into the budget. Be realistic!
Keep an eye out for sales and used items to stretch your budget even more.
7. Deploy the Project
The deployment phase is simple. You have a detailed project plan. Now all you need to do is follow it.
When deploying a technology in your home, always try and do it right from the start. Every time you create a FW rule, add notes in the rule so you will understand it later. When assigning an IP, make sure it will fit into your network design.
Many times you will want to jump around in the plan. You may want to deploy a doorbell, but before you complete it, you may want to jump to installing motion sensors or build out a Home Assistant server. Stick to one thing, finish it the right way, then move on.
This may mean you will do some work twice. If you deploy your doorbell before you were planning to deploy your home assistant software, then you may not have the ability to connect your doorbell to your NAS for recording.
The stress of building out such a complicated network of smart devices will be manageable only if you walk through each phase of the project according to your plan.
Focus on just the tasks you are working at the moment and hopefully you can avoid burnout and complete the project successfully.
8. Minimalize Data and Services
We all have a habit of collecting more and more stuff without any regard to its usefulness. Data is the worst because it doesn’t really take much space but does have a very high mental toll on you.
Take the time and clean up data that is no longer useful. It will make the backups go faster and save a lot of money on cloud storage and archive media.
I also recommend cleaning up unused service accounts. People signup for all sort of stuff, free or paid, and the risk is having your data stolen by hackers. Take the time and delete your accounts on as many unneeded services as you can. It will reduce your risk to hacking and identity theft.
I feel cleaning up and organizing your data is really important and I created a separate article to help you. It is called Getting Organized through Digital Minimalism and I hope you like it.
9. Retire Old Hardware (Recycle and Destroy)
When you go through and start upgrading hardware, you must retire and get the old stuff out of the house. When you buy a new laptop, sell or donate the old. When you upgrade a hard drive with SSD, destroy the old one. Sell what you want, donate what you can, and recycle the rest.
So many people keep the old tech around because it still works and can be a useful backup in case the new hardware fails. Hardware has become so cheap, parts delivered to you within 24 hours, and cloud services very functional, that you have very little need for storing backup hardware.
Do yourself a favor and cleanup as you upgrade. Your family will thank you for not hording junk beyond its time.
10. Regularly Review Design
Sorry to say, this is not a once and done project. New technology is coming out every day and new services are coming out at an alarming speed. You need to continuously review your technology refresh plan and see if it would meet your objectives.
If you build a modern, simple, but expandable foundation for your home (or business), you can easily adapt to any new tech in the future. The core networking, internet, and other basic services should be able to support new technology releases if they were designed and implemented right.
I find myself constantly adding and removing goals and tasks from my original project plan and that is OK. The plan adopts to my current needs and objectives. Budgets change over time and some tasks can be added or removed due to budget changes too.
The key is to be agile in your approach but fixed on your objective. This way you can easily navigate your way in this ever changing world.
Conclusion
Doing a technology refresh at home (or your business) is often completely worth the time, money, and effort in the long run. When you design all your technologies to work together, they multiply their convenience and abilities in ways you can barely imagine.
I say this from a techie point of view. I find these projects incredibly fun and interesting, and therefor not an inconvenience, and a great way to spend my evenings. If you are technically challenged, you can still deploy a tech refresh project of your own. It should just be simple and well thought out, and from projects designed to work well together.
I hope this article helped you start your technology refresh at home project and I hope you are enjoying it as much as I do. If you have any advice you want to share, please consider leaving it in the comment section below. Please also consider signing up for our email list and be the first to hear about new articles on the site.
Thankyou for reading!


